
The DJI Osmo Pocket 3 is arguably one of the best pocket-sized cameras for vlogging and YouTube. With its compact design, advanced features, and excellent image quality, it comes close to being the ideal content creation camera. But before you invest your hard-earned money, here are five important things you should know. The good news? Each of these potential issues has a simple solution.
The Lack of Aperture Control
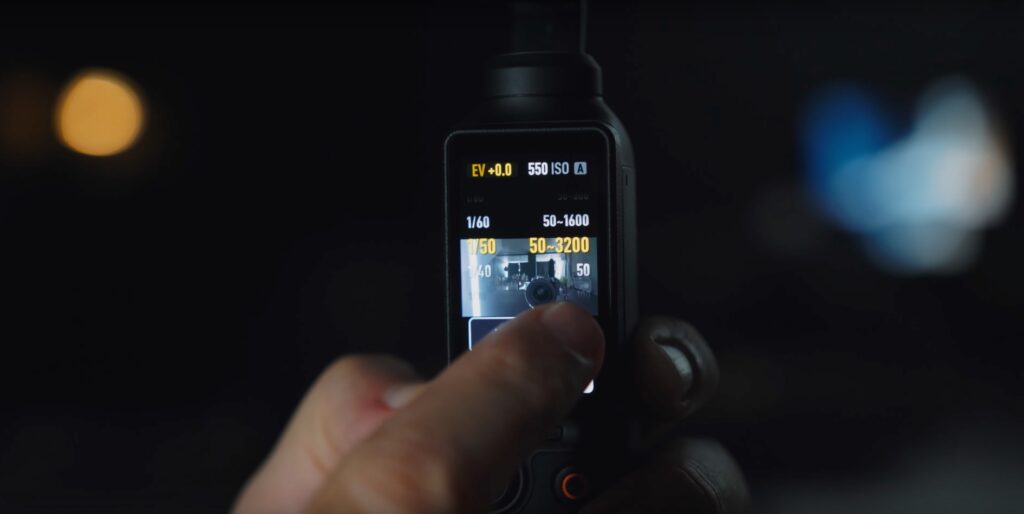
One of the limitations of the Osmo Pocket 3 is the lack of manual aperture control. If this is your first camera, you’ll likely use it in auto mode, which might not deliver the cinematic look you’re aiming for. The main culprit in auto mode is fluctuating shutter speed, which can make motion appear unnatural.
To fix this, switch to manual mode and follow the 180° shutter rule: set your shutter speed to double your frame rate. For example, if you’re shooting at 24 FPS, your shutter speed should be 1/48.
Unfortunately, because you can’t adjust the aperture, you’ll need ND filters to control exposure in bright conditions.
These filters, which act like sunglasses for your camera, are essential for preventing overexposed footage. If you’re new to ND filters, don’t worry—they’re straightforward to use and well worth the investment.
Managing Digital Sharpness
The Osmo Pocket 3 features a 1-inch sensor capable of capturing stunning 10-bit 4K video and 120 FPS slow motion.
While this produces sharp and detailed footage, it can sometimes be too sharp, especially for filmmakers seeking a softer, more organic look.
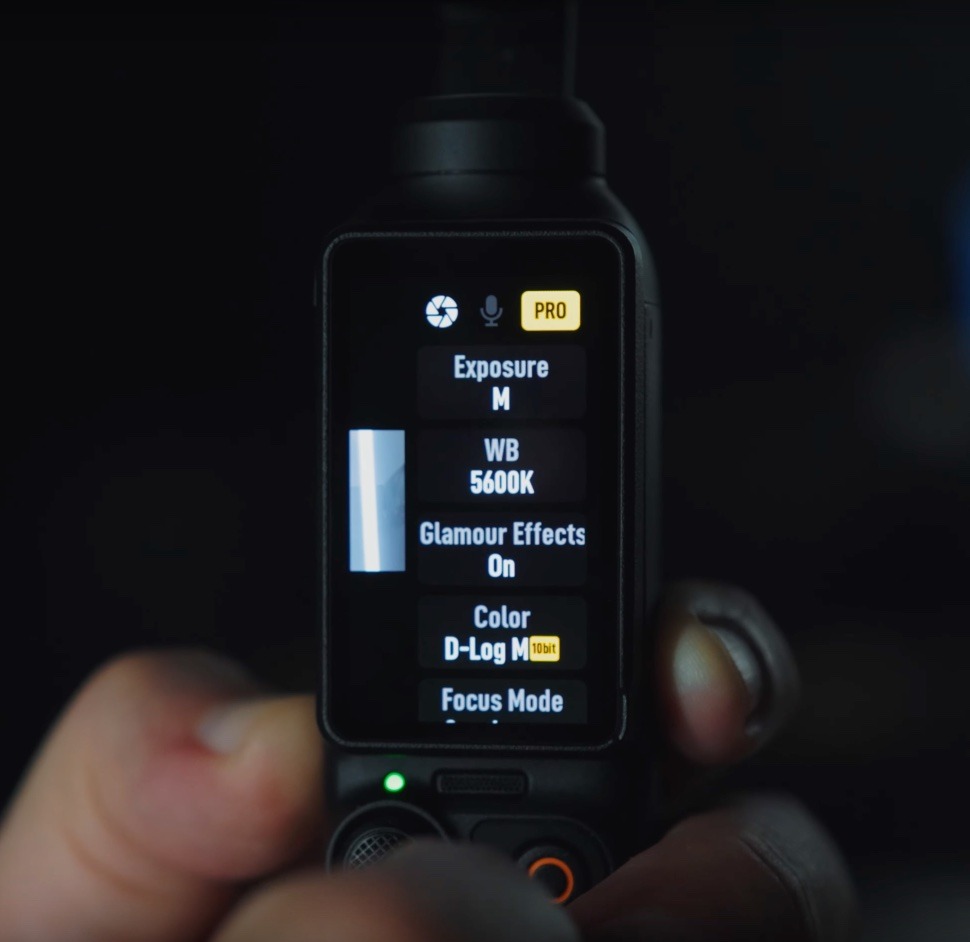
To address this, shoot in D-Log mode, which offers greater creative control during post-production.
D-Log footage requires color grading, but using tools like DaVinci Resolve or Final Cut makes the process manageable.
For faster results, you can use LUTs (lookup tables)—presets that apply color grading automatically. Think of it as a plug-in that automatically color grades your footage with a preset look.
The process of applying LUTs is quite easy, especially with DaVinci Resolve. You can see my tutorial on color grading with DaVinci Resolve.
If you’re new to LUTs or need some new ones, you can purchase my Filmic LUT Pack Bundle. The Bundle pack comes with Filmic LUT Pack 1 and Filmic LUT Pack 2, giving you a total of 24 LUTs to spice up your next footage.
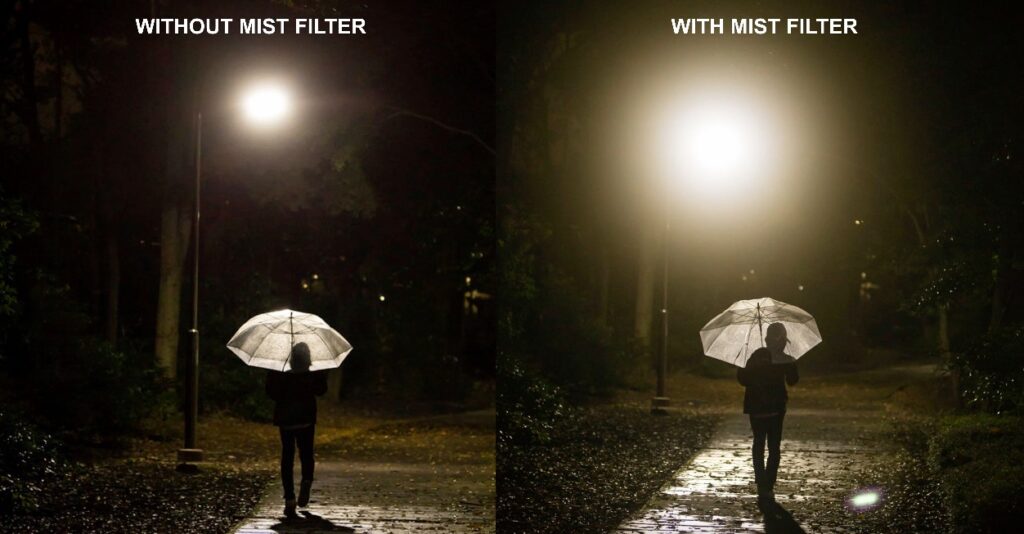
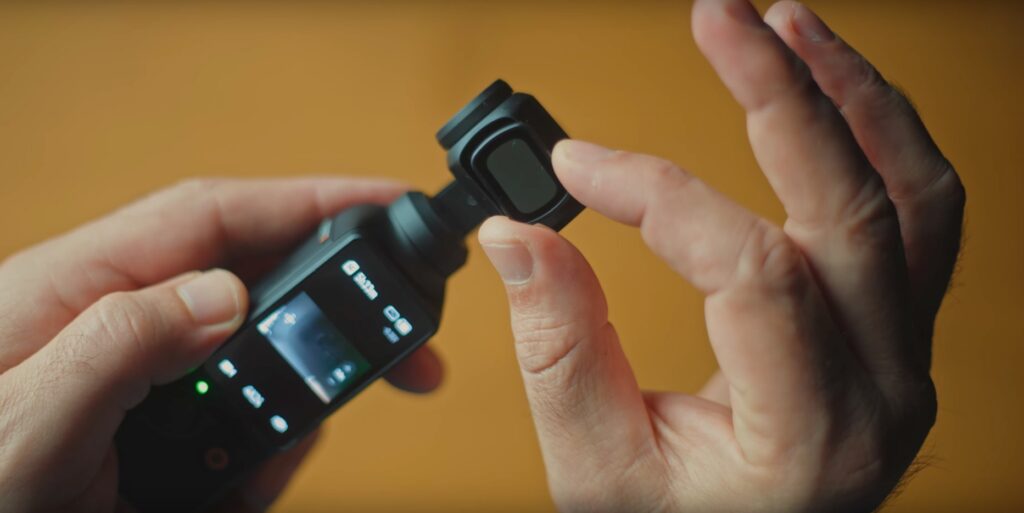
If that isn’t enough for you, and you’re still looking for an even softer aesthetic, then consider using a mist filter. A mist filter diffuses the light, softening the image and creating a pleasing bloom effect in highlights. In turn, it gives your footage a nice vintage vibe.
The Rotating Screen Quirk
The Osmo Pocket 3’s 4.2-inch rotatable screen and 3-axis gimbal provide excellent stabilization and versatility for both horizontal and vertical shooting. However, a minor quirk occurs when you rotate the gimbal 180 degrees: the display shows what appears to be flipped footage.
Fortunately, this glitch is limited to the screen and doesn’t affect the recorded footage. Knowing this can save you unnecessary stress while filming. Hopefully, DJI addresses this with a firmware update, but for now, it’s an issue you can safely ignore.
Choosing the Right Package
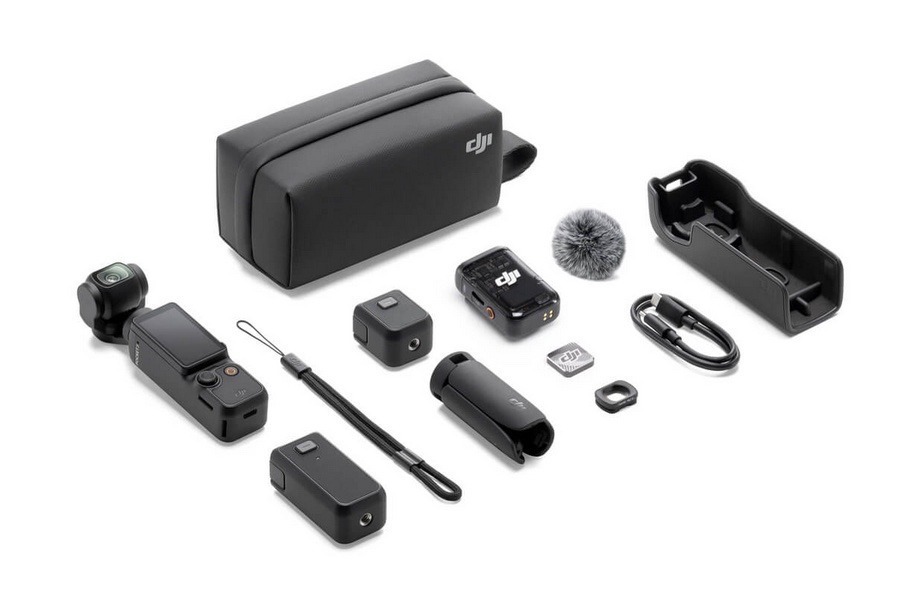
While the Osmo Pocket 3 is reasonably priced for what it offers, purchasing the wrong package can cost you more in the long run.
The Creator Combo is the best value, as it includes must-have accessories such as a DJI wireless mic for high-quality audio, a wide-angle lens adapter for vlogging, a battery grip for extended runtime, a mini tripod, and a carrying case to keep everything organized.
Buying these items separately will cost significantly more, so the Creator Combo is a smart investment for maximizing your camera’s potential.
Audio Quality and Microphone Options
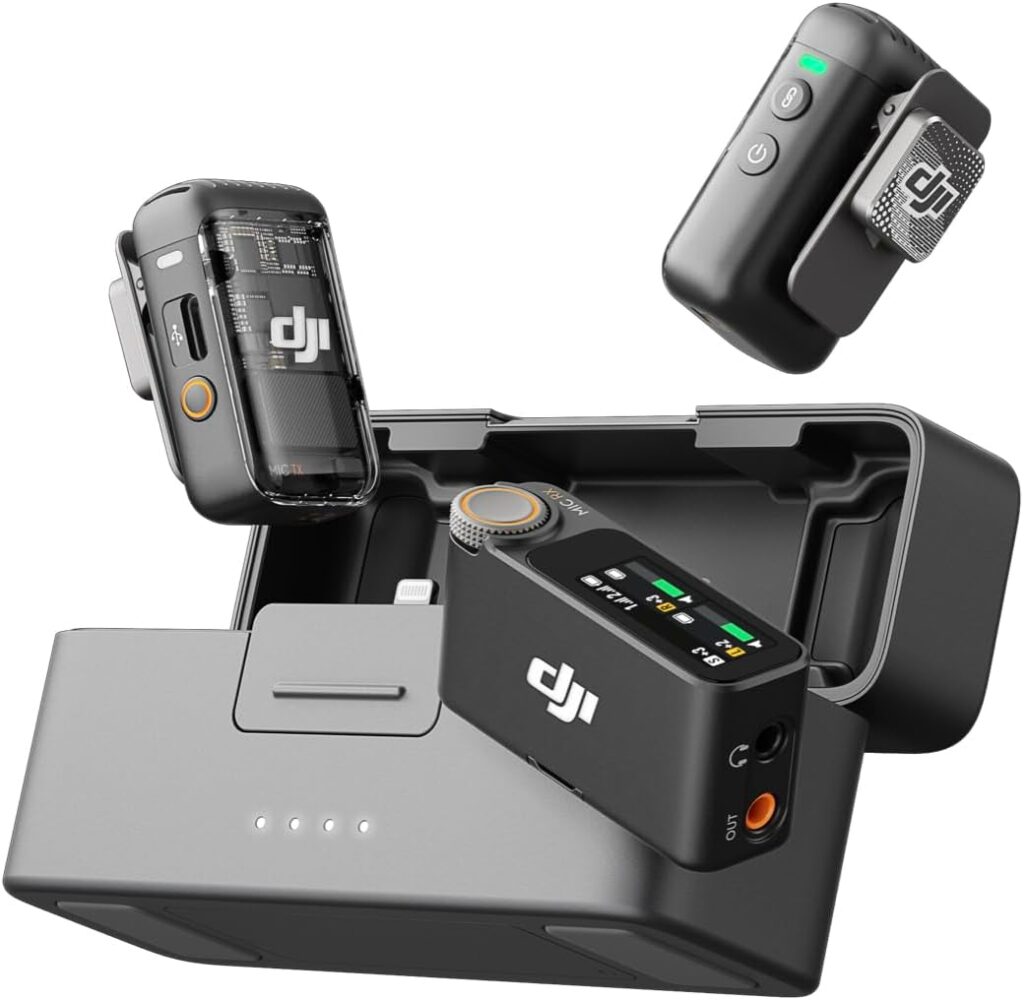
If you’ve already purchased the Osmo Pocket 3 without the Creator Combo, you might find the onboard microphone’s quality lacking. Fortunately, you can pair the camera with a single DJI transmitter for improved audio for just $90.
For interviews or projects requiring two microphones, buying two transmitters individually is a cost-effective alternative to the DJI Mic 2 system, though you’ll miss out on the charging case. The DJI Mic 2 system includes 2x DJI mic transmitters, a receiver, carrying bag, USB-C charging cable, 2 windscreens, 2 clip magnets, a 3.5mm TRS camera audio cable, a lightning mobile phone adapter, and a USB-C mobile phone adapter.
For professional-quality audio, consider using an external shotgun mic plugged into the DJI transmitter. This setup delivers excellent sound quality for documentaries and other professional projects. If portability is a priority, the Sanken COS-11D lavalier mic offers incredible audio quality and can be discreetly hidden under clothing, though it comes with a higher price tag.
Final Thoughts
When used with these tips and accessories, the DJI Osmo Pocket 3 can produce results comparable to cameras costing several thousand dollars more. It’s versatile enough for professional projects like documentaries, vlogs, and travel videos. While there are minor limitations, they’re easily overcome with the right tools and techniques.
If you’re considering the Osmo Pocket 3, I wholeheartedly recommend it. And while choosing the right camera is important, the tools you use to enhance your workflow are equally crucial. Check out my article on some of the best AI tools for creatives. Thanks for reading, and I’ll see you in the next one!
* As an Amazon Associate I earn from qualifying purchases. The links above earn commission. Thanks for the support!